
Character System Module
The Character System Module allows you to set up characters with custom sprites, including animated sprites, and introduces two new layout templates for character display.
You can then call these characters directly during dialogue to display their sprites dynamically.
How to Add Characters
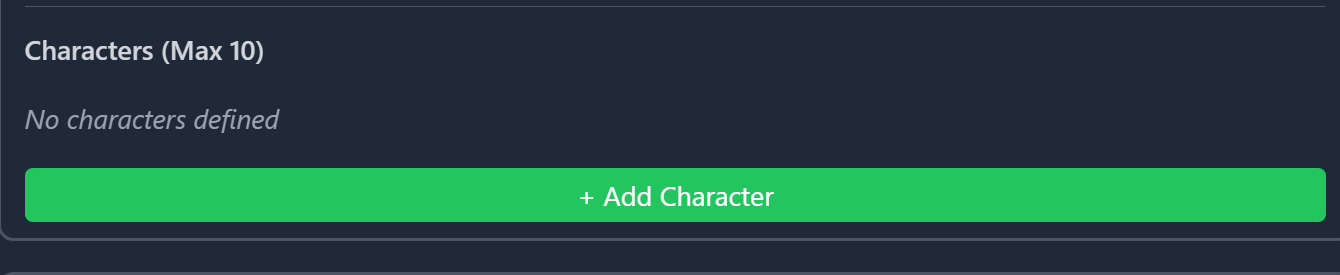
To create a new character, click the green “Add Character” button:
Once a character is added, you can configure all of its settings inside the Module Settings Panel:
Character Setup Overview
-
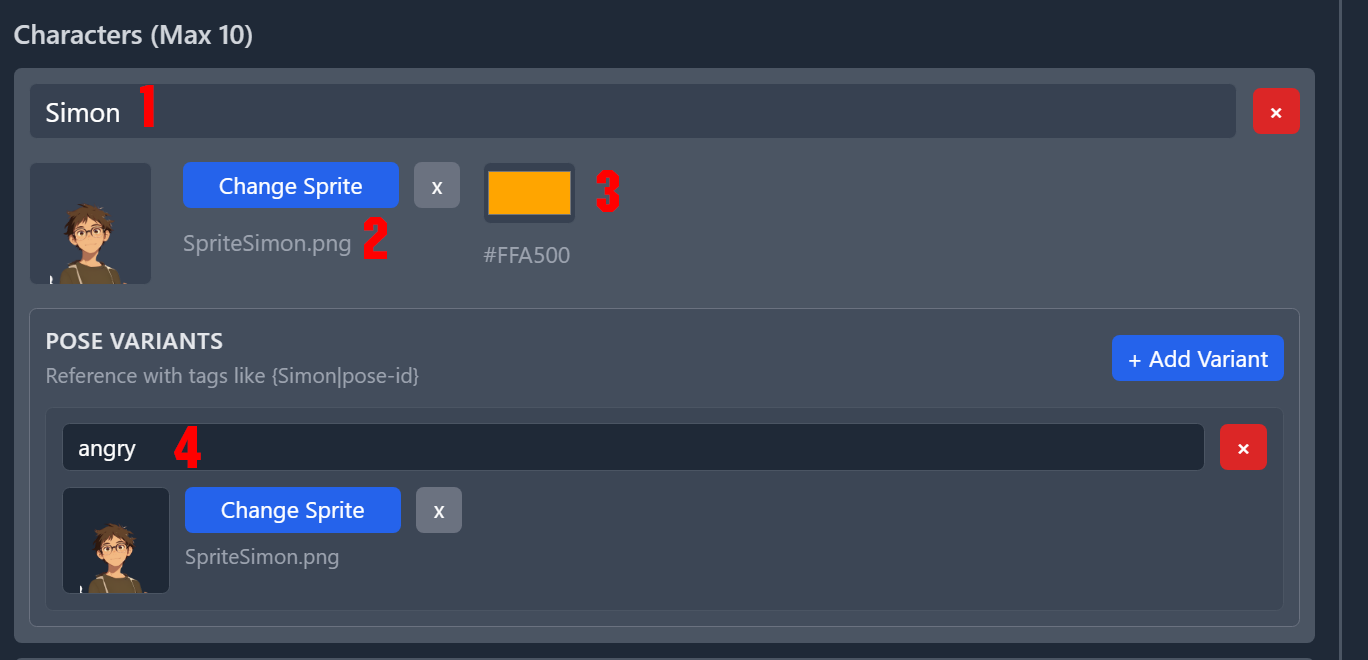
Character Name
The identifier you’ll use inside your Story Text to call and display this character’s sprite. -
Base Sprite
The default image shown when the character is called without specifying a variant. -
Name Color
The display color for the character’s name when shown in dialogue. -
Variants
Each character can have multiple variants, which can be triggered by specifying a variant ID in the text (for example:angry,happy,tired, etc.).
Each variant requires:- A Variant ID (unique label such as
mood:angry) - An associated sprite
- A Variant ID (unique label such as
Character System — Advanced Settings
In addition to adding characters, the module provides a range of customization options for fine-tuning their appearance and behavior.
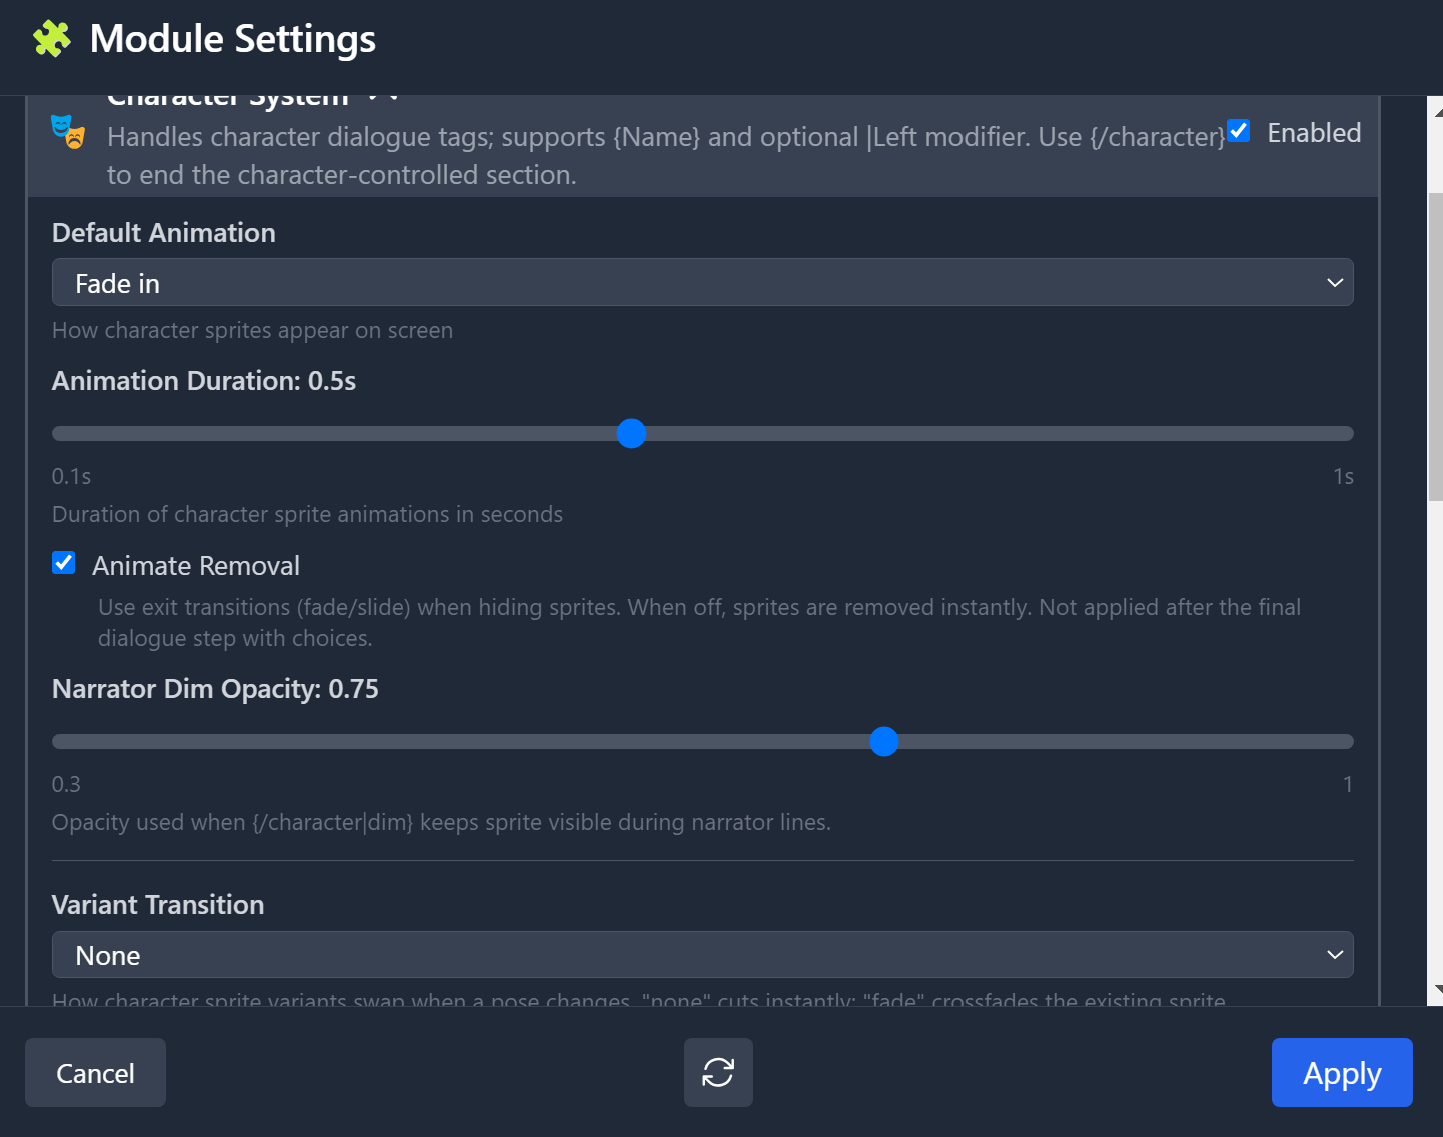
Most settings include tooltips for quick guidance, but here’s a full breakdown:
-
Default Animation
Controls how the character sprite appears on screen.
Options include:- Fade In
- Slide
- Fade In + Slide
- None
-
Animation Duration
Defines how long the entry animation lasts. -
Animate Removal
Enables or disables reverse animation when removing a sprite.- On: The default animation plays in reverse during removal.
- Off: The sprite disappears instantly.
-
Narrator Dim Opacity
Sets the opacity multiplier (range 0.3 → 1) for Dim Mode —
which adjusts background dimming when the narrator is speaking (see Dim Mode below). -
Variant Transition
Determines the animation or effect that plays when switching between variants
(e.g., a character changing expression from happy → angry). -
Template Style
The Character System Module overrides your Project’s default templates.
You can choose between two text display layouts:- Full Text — standard dialogue box layout
- Text Border — compact bordered style for a lighter interface

How to call a Character
In your StoryTile, while writing the story, as long as the character module is enabled, you can use this pseudo code to call and return a character sprite.
-
{CharacterName} → Example: {Simon}
-
{/character} → this is nameless, and will remove the last character. Calling a new character will also remove the previous one. If it is the end of the text inside the StoryTile, it will automatically clears everything.
-
{CharacterName|Variant} → Example: {Simon|Angry} calls a specific variant sprite.
For example :
{Simon}I will not give up!{Simon|Happy} I know we can do it!Will have 2 steps, one with Simon sprite saying : “I will not give up!” Then Simon Happy sprite will replace the previous one and the step will show “I know we can do it!”
Understanding Stepping
When using the Character System Module, your story text is automatically divided into steps.
This means your StoryTile is split into multiple text blocks whenever there’s a character change, narrator call, or similar event.
Each block is linked by a “Continue…” prompt, requiring the user to click before moving to the next step.
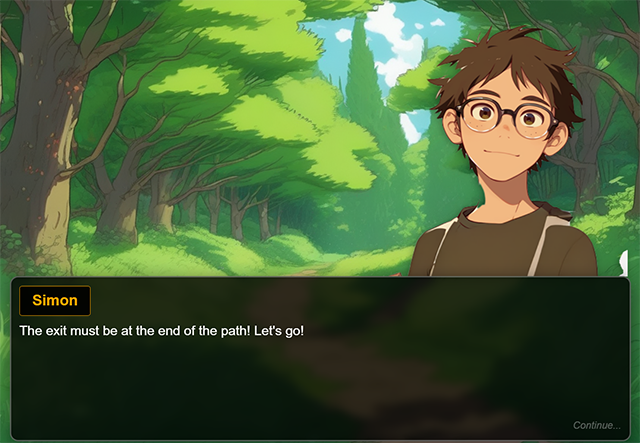
Here is an example
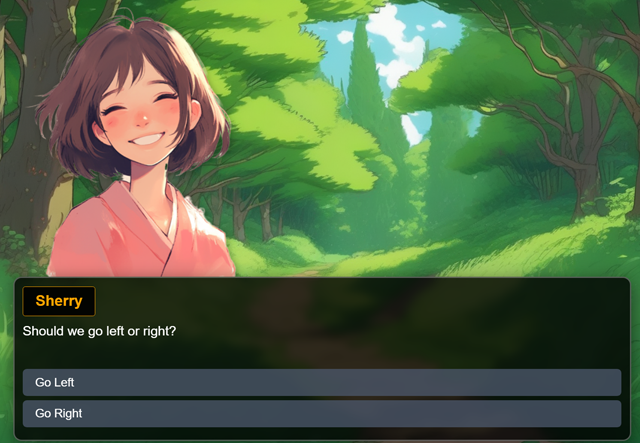
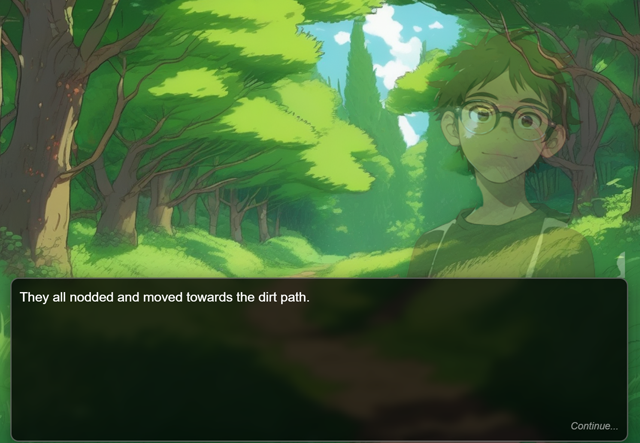
{Simon}The exit must be at the end of the path! Let's go! {/character} They all nodded and moved towards the dirt path. {Sherry} Should we go left or right?Will result in theses 3 steps :
-
Character from Simon will show, with character name and the text “The exit must be at the end of the path! Let’s go!”. At the bottom the small continue will show up. When the user presses again. It will go to step 2.
-
The narrator now takes over. With the text “They all nodded and moved towards the dirt path.” Again the continue will show.

-
Character Sherry will show, with text “Should we go left or right?” and as it is the latest in the StoryTile, it will automatically show the choice buttons. (Please refer to the help about choice branching for more info)

The Extra cases
In addition to variants characters can have different options as well.
For example :
Position :
{Sherry|Left} Should we go left or right?Would have the sprite of “Sherry” be on the left and automatically mirrored.
Dim/Keep
{/character|Dim} They all nodded and moved towards the dirt path.Using |Dim or |Keep when you remove a character. Will switch to narrator but either dim (based on percentage from module setting) or keep the sprite during the narrator step. This is useful for example when you want to keep one character and have the narrator comments on it.
Experimenting
All of these commands can be combined freely and are not case-sensitive, so feel free to experiment!
For a deeper dive and more examples, check out our official video tutorials on our channel or join us on Discord for direct support.
The system is designed to be as flexible as possible and will automatically correct minor mistakes whenever it can.
ViZual™ and Singular Echo™ are trademarks of Singular Echo Inc.