
StoryTile Overview
StoryTiles are the core building blocks of your project.
Think of each one as a step in your story : a self-contained scene that can include text, background, video, music, or audio, and ends with one or more choices leading to the next part of the narrative.
-
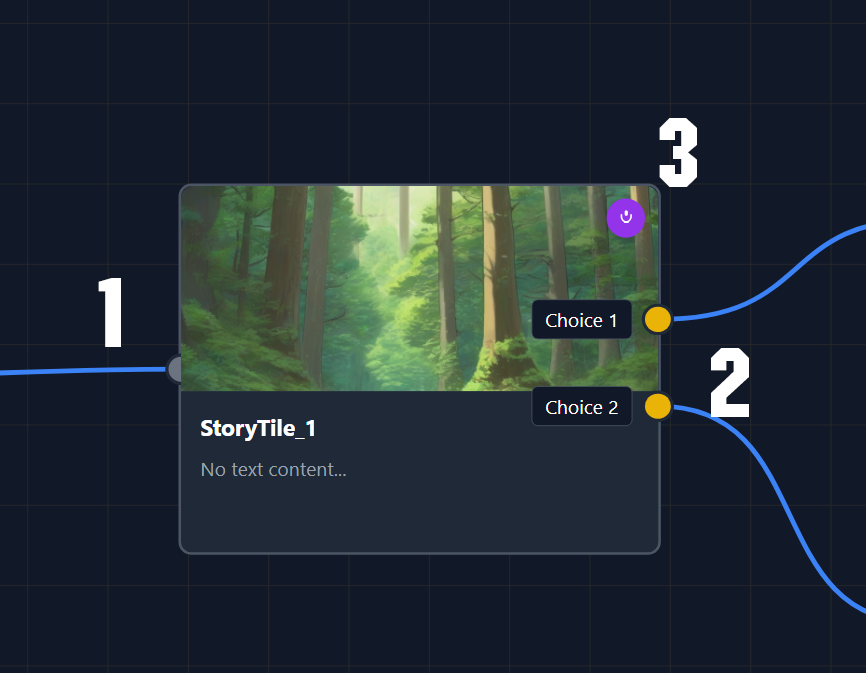
Input — The incoming path to this StoryTile.
Multiple connections can lead into the same StoryTile (for example, if several branches merge together), but each StoryTile can only have one active input. -
Outputs — The outgoing branches from the StoryTile.
These can be single or multiple connections, and are automatically created based on the Choices defined in that StoryTile.
Each output determines which StoryTile the player will move to next, depending on their choice.
(See #Choices below for more details.) -
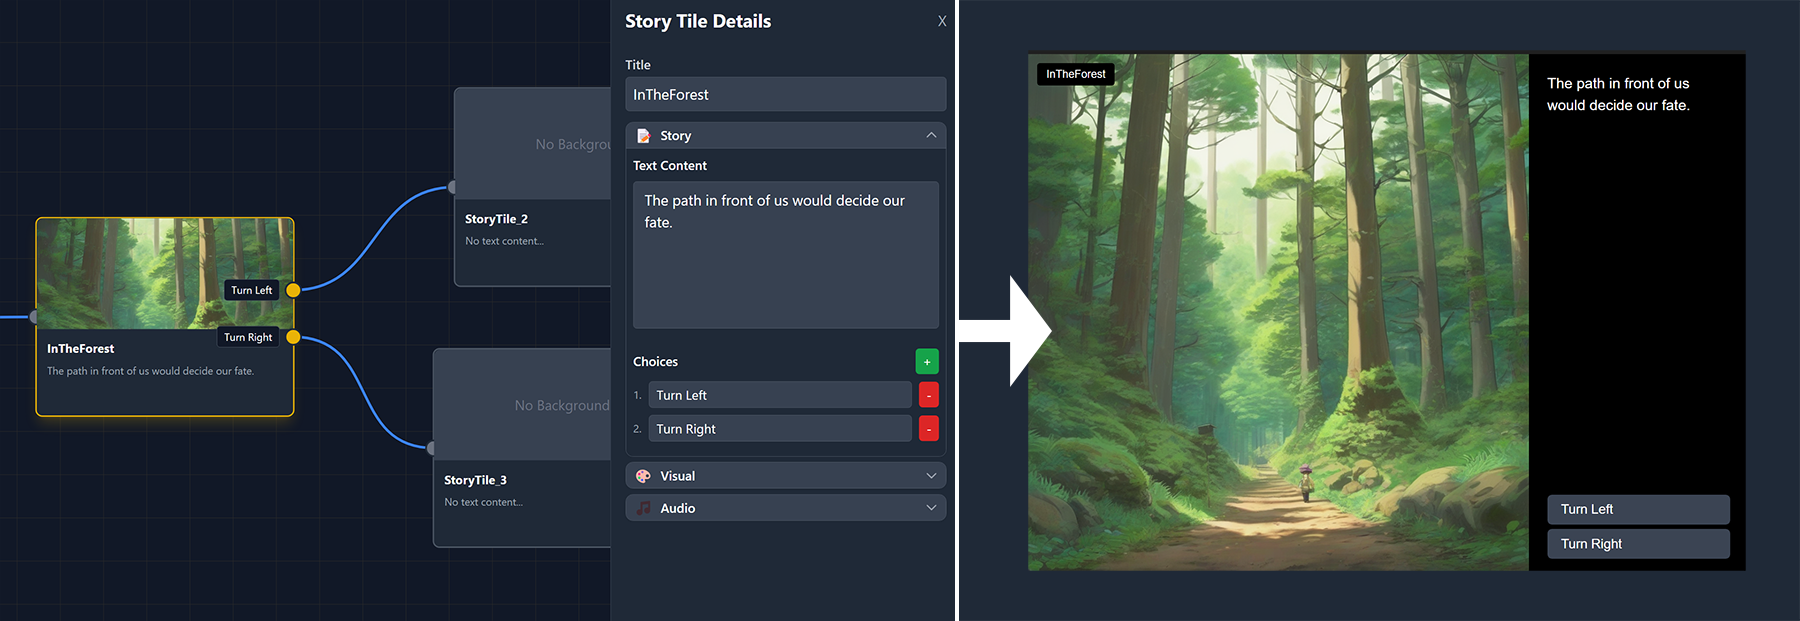
Information — Each StoryTile displays useful information in real time, including:
- The background currently assigned
- Whether voice-over, video or music is present
- A preview of the story text contained within the tile
- The StoryTile Title
Creating and Connecting StoryTiles
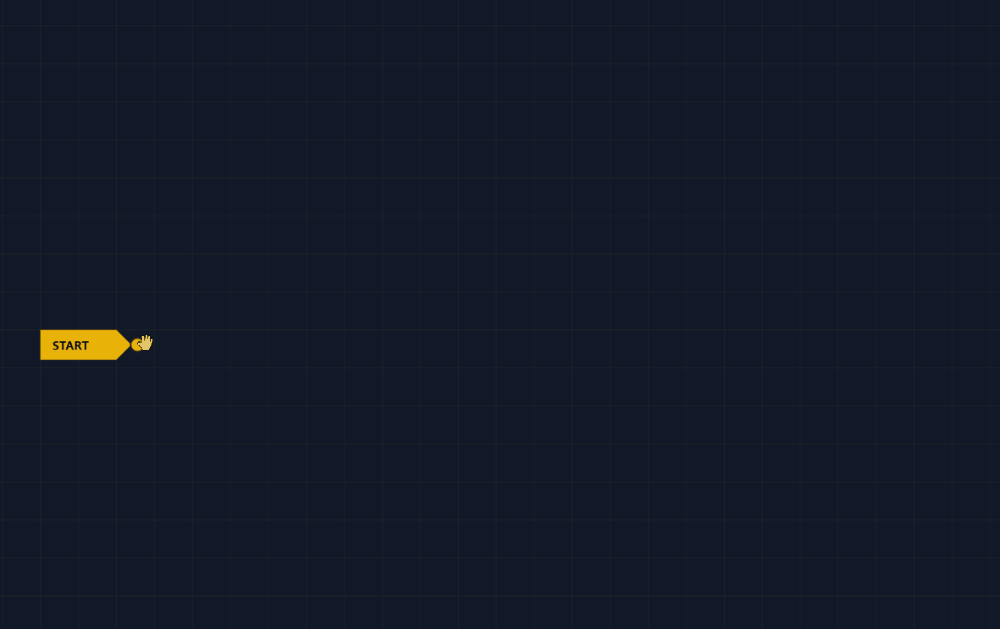
To create a StoryTile, start from any output node.
If you’re beginning your story, the Start Node will serve as your first output.
(Note: the Start Node isn’t a StoryTile itself — it contains your Project Settings. See Start Node for more details.)
Simply click and drag from any output, then release — a new StoryTile will be created automatically.
You can also connect nodes manually by dragging from any output to an input (or vice versa) to create new connections between StoryTiles.
To remove connections, right-click on a StoryTile — this will give you the option to break any existing links to or from it.
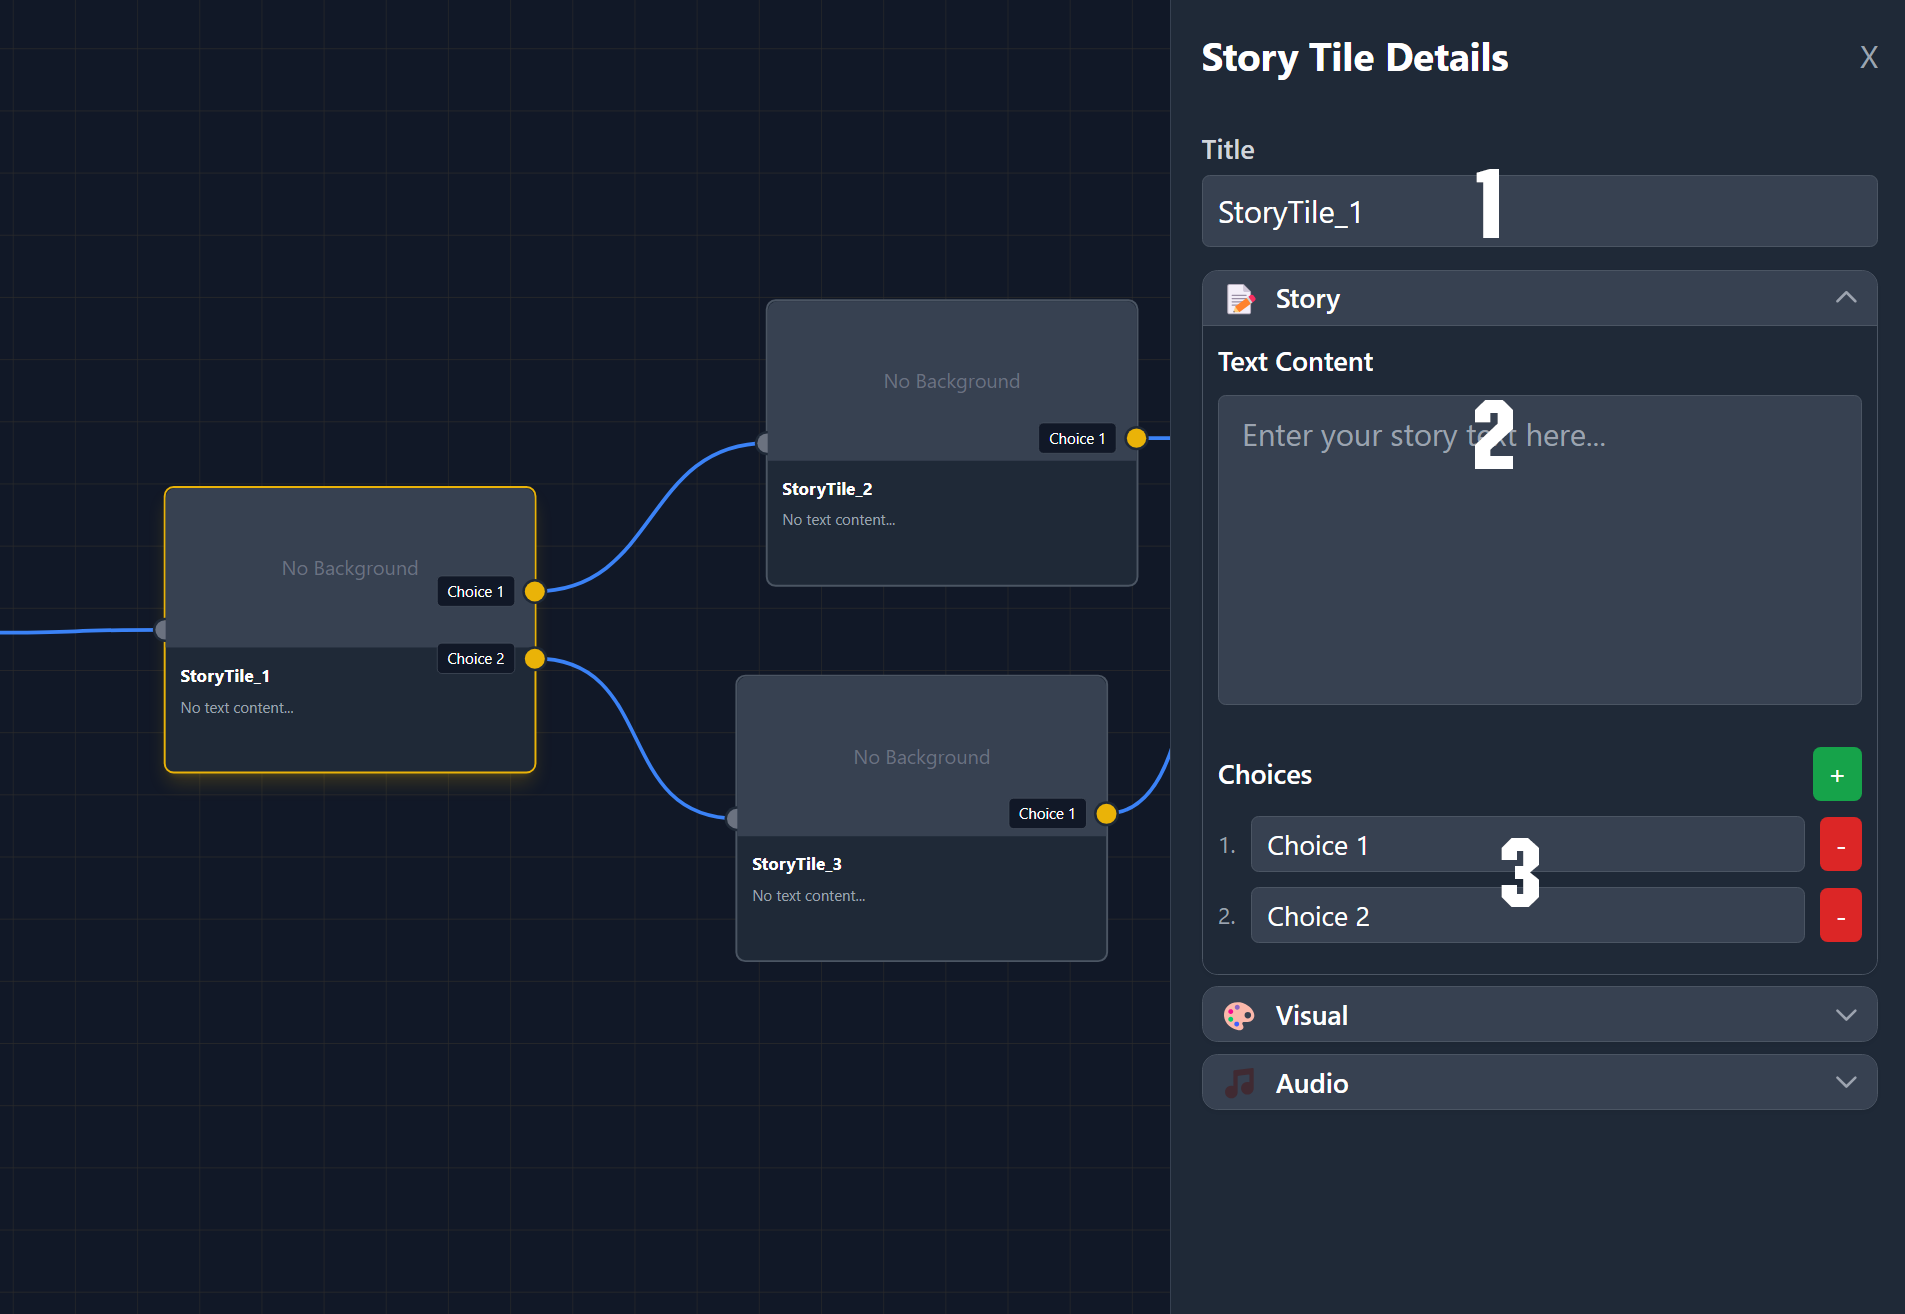
StoryTile Details Panel
When a single StoryTile is selected, the Details Panel will appear on the right side of the screen.
This panel lets you control everything that happens when the player reaches this StoryTile — including text, visuals, audio, and choices.
-
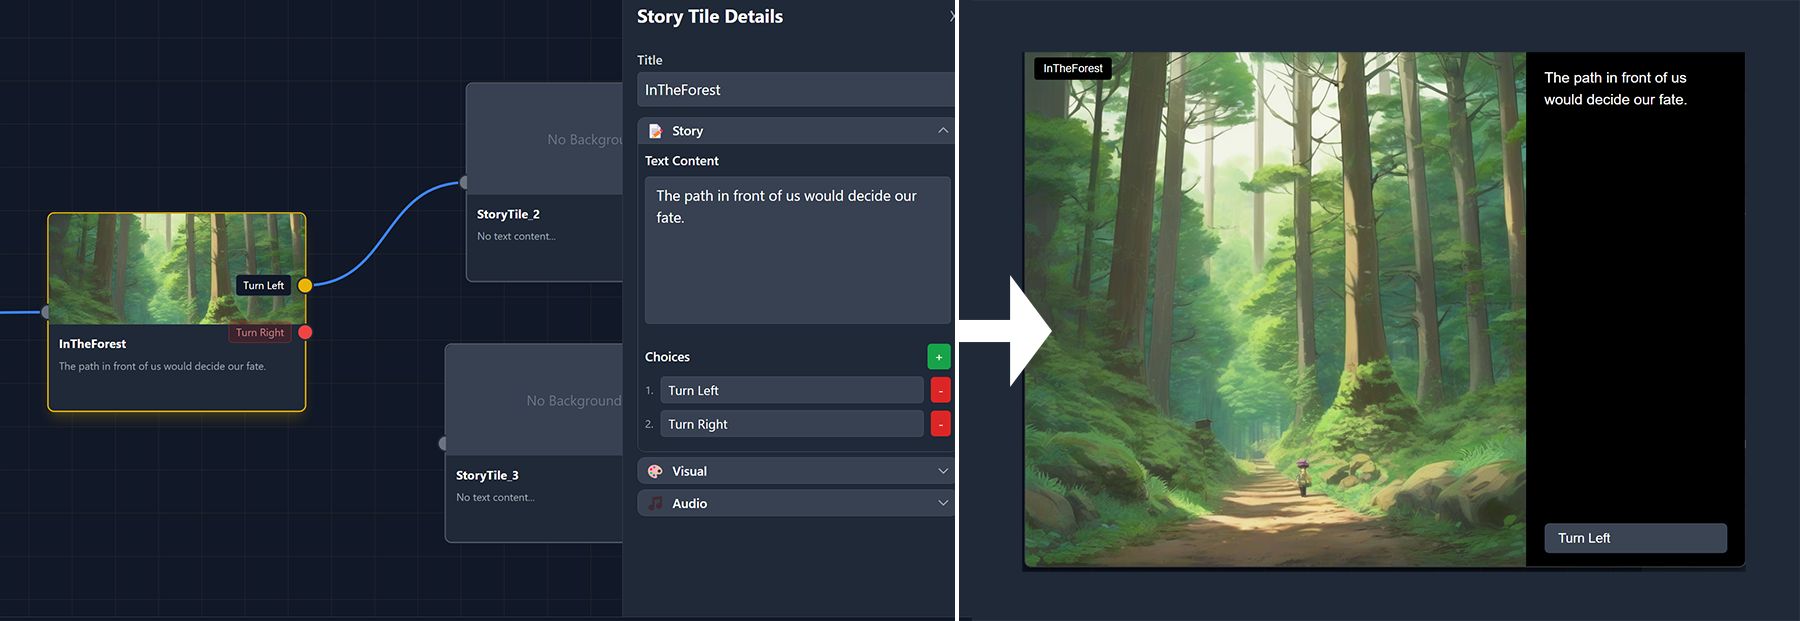
StoryTile Title — Used to identify and keep track of each StoryTile, similar to an ID.
Depending on your Project Settings, this name can also be displayed during Play Mode to help debug or trace your story flow. -
Text Content — The main story text shown to the user when this tile is reached.
This is where you write the actual content of your story scene. -
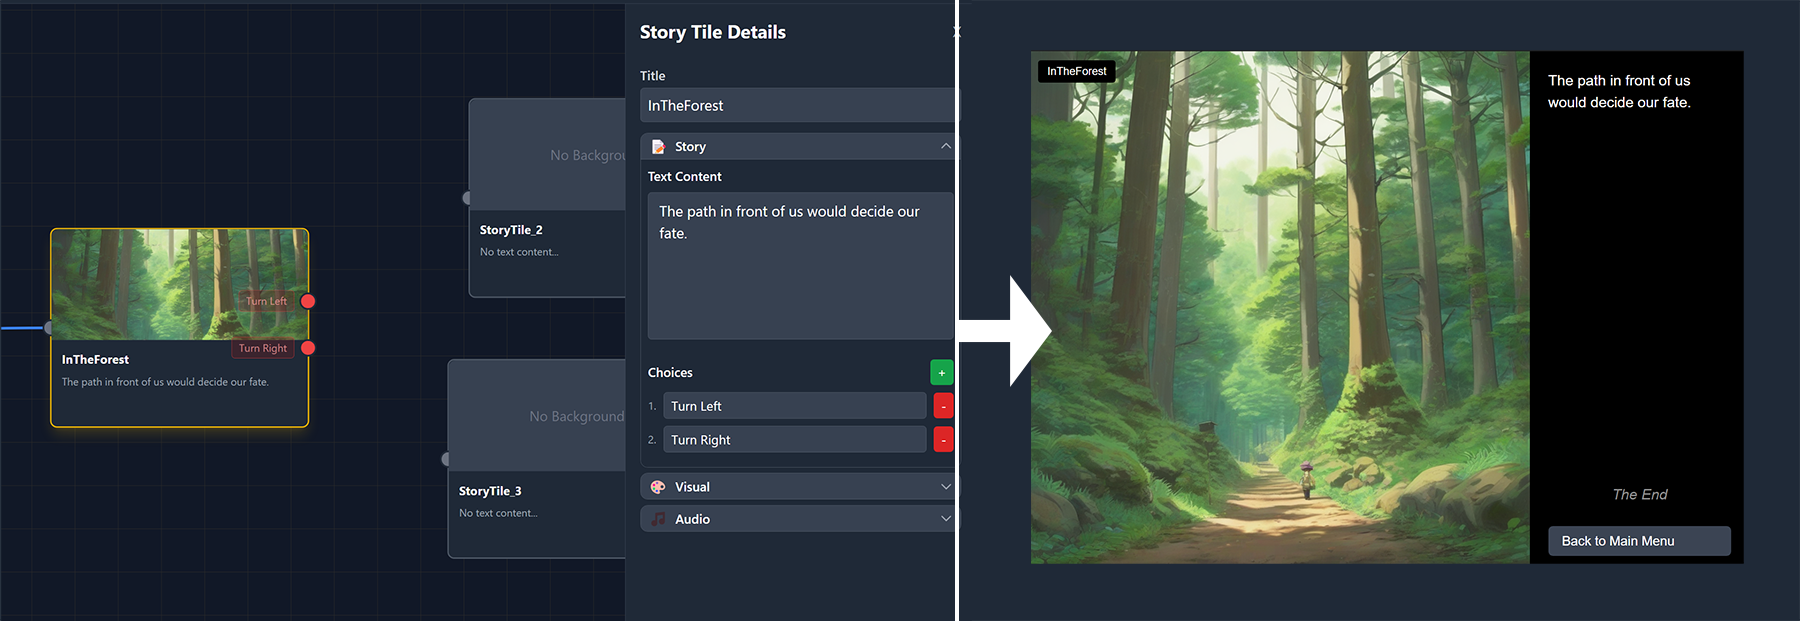
Choices — Each StoryTile must have at least one choice (unless it’s an ending tile; see below).
Use the + / – icons to add or remove choices.
The choice text is what the player will see and select during gameplay.
Every new choice automatically creates a new output connection on the StoryTile.
Automatic Choice Setup
The number of choices you’ve set up in a StoryTile determines how many choice outputs are available.
However, only the outputs that are connected to another StoryTile will be visible to the user.
If an output is not connected (it will appear red), the corresponding Choice Button will not appear for the user.
This rule also applies to the end of your story.
If no choice outputs are connected, ViZual™ will automatically treat the tile as an ending and replace the choice buttons with a Return to Menu button.
ViZual™ and Singular Echo™ are trademarks of Singular Echo Inc.